 Naval Aviation
Beyond Visual Range Combat 101
Welcome to the beyond visual range (BVR) combat guide for the F-21B.
Controls
First, let's isolate the controls that are used for BVR combat.
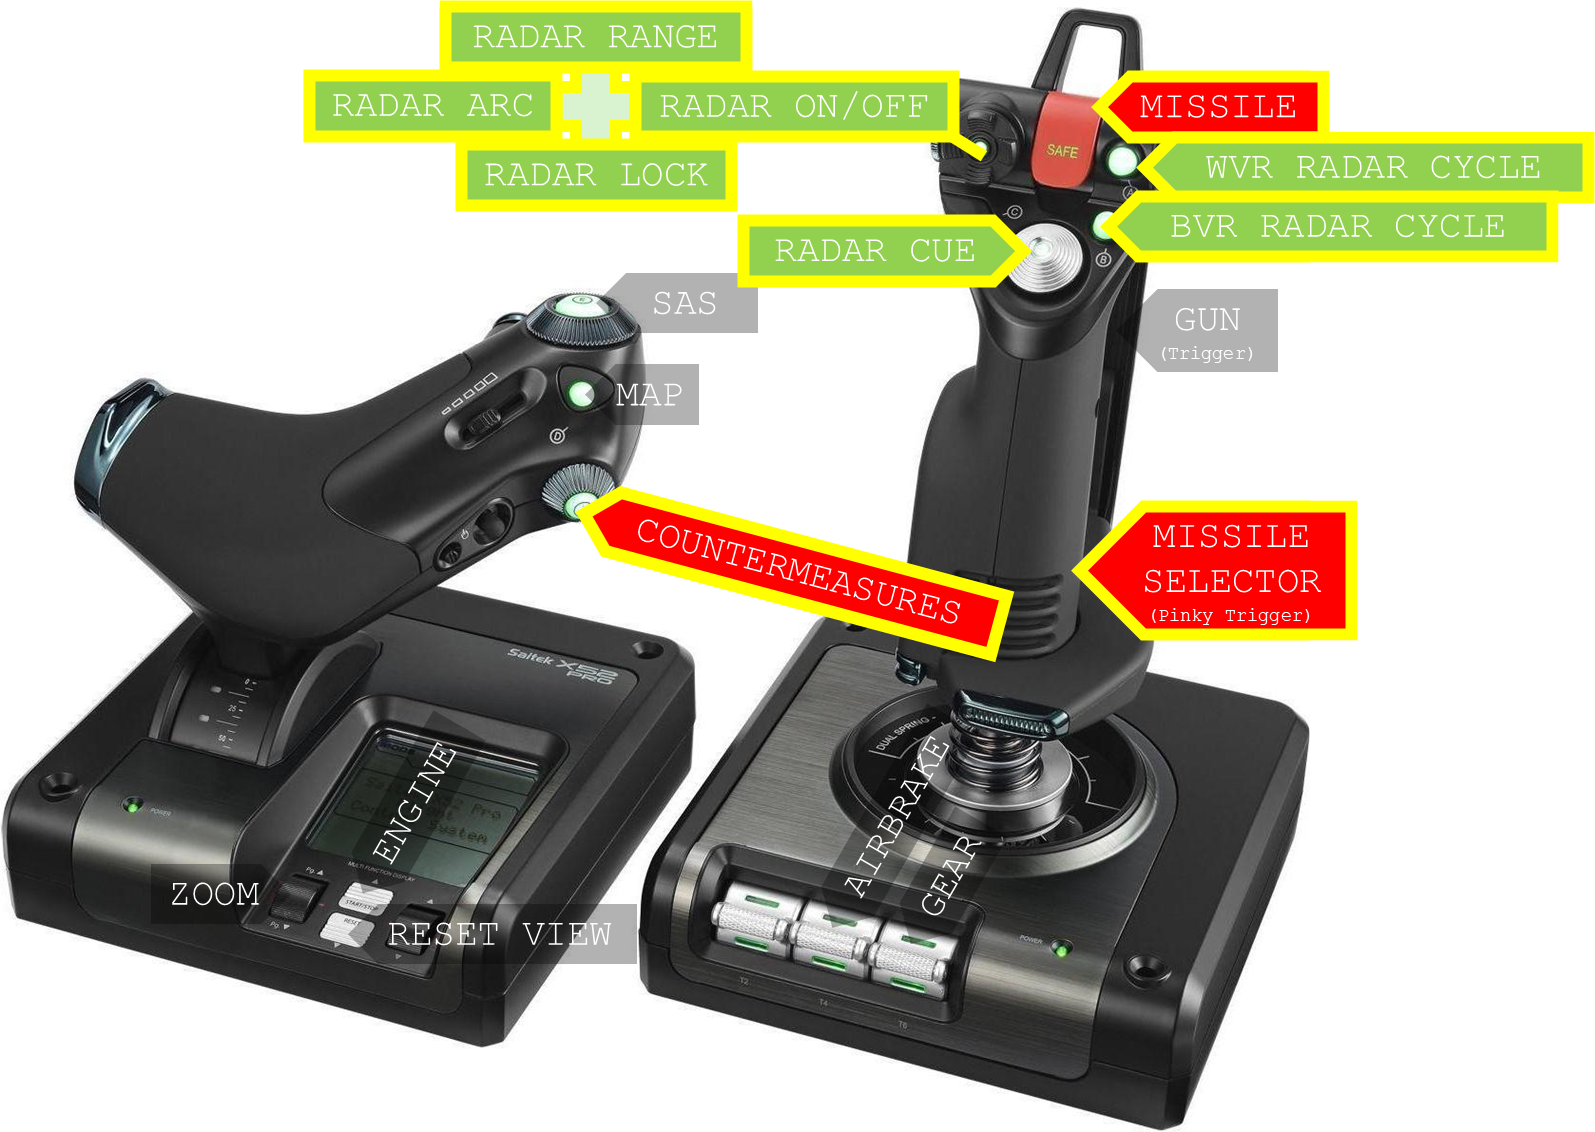
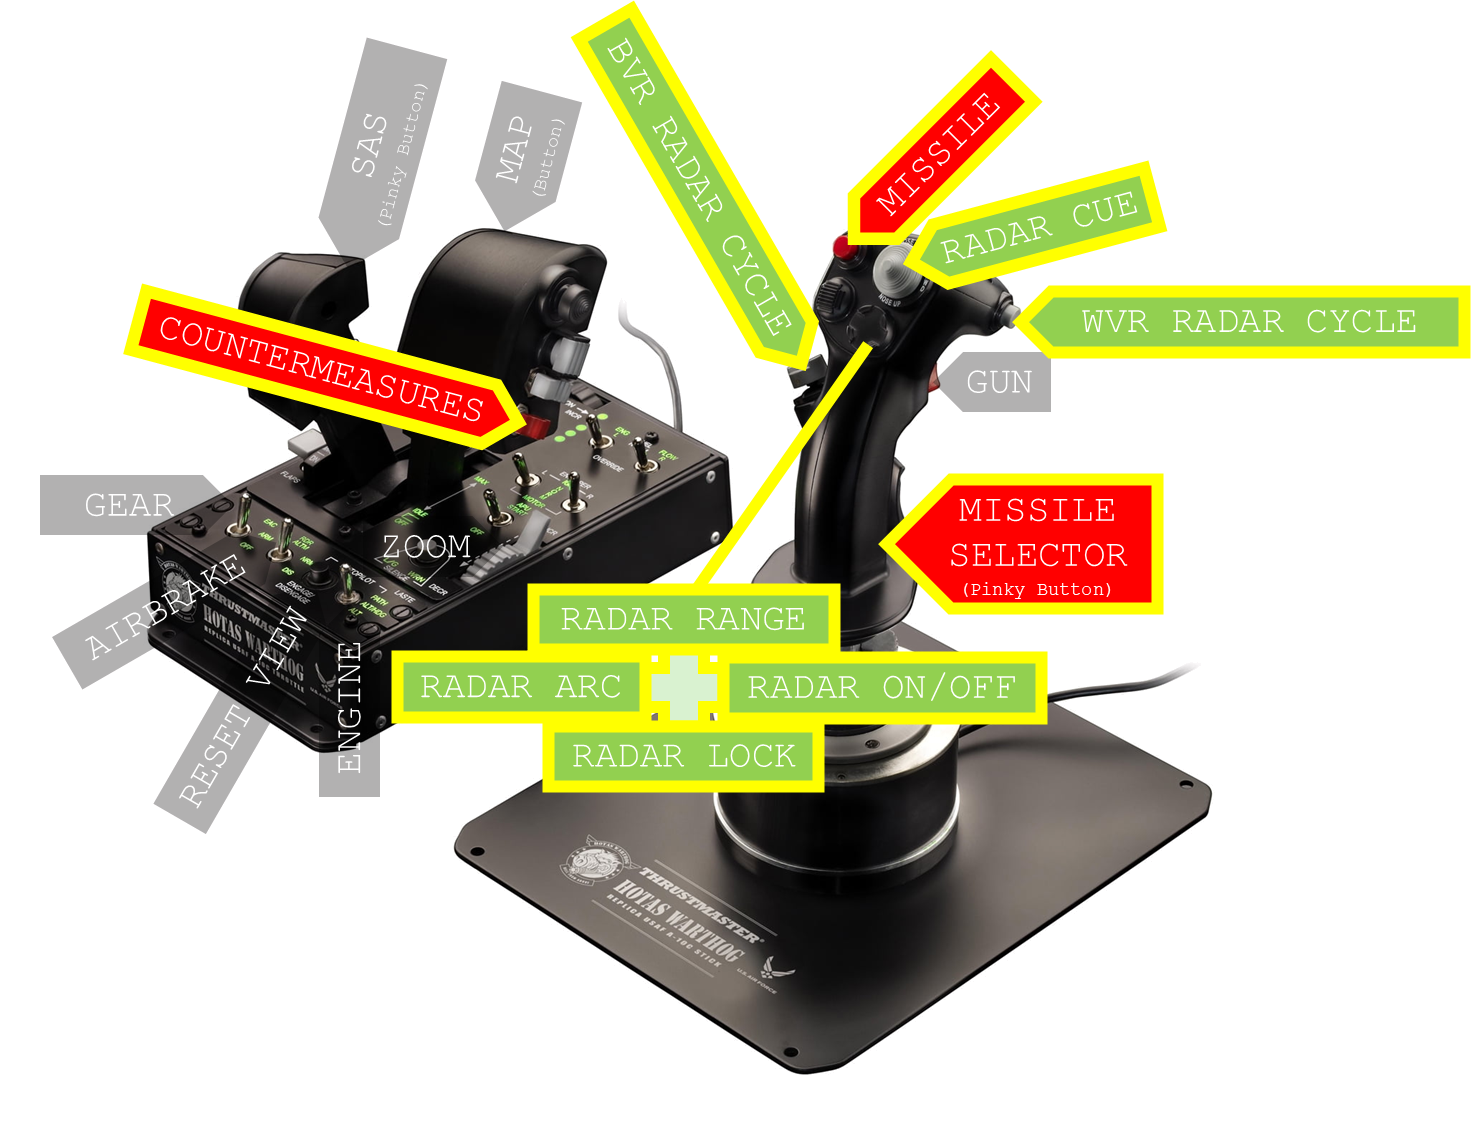
The controls in both HOTAS layouts are the same, just in different positions. Here are the full descriptions of the relevant controls:
| Name | Description |
|---|---|
| RADAR ARC | Toggles the scan arc of the radar. The options are 20°x20°, 40°x20°, and 70°x20°. This means you can increase your horizontal radar scan arc, but that comes with the downside of a slower scan. |
| RADAR RANGE | Controls the range of the radar scope. The options are 12, 25, 62, and 124 mi. |
| RADAR ON/OFF | Toggles your radar on/off. Can be useful to stop giving the enemy your bearing via RWR, but leaves you blind. |
| RADAR LOCK | Forces the radar to enter single target track (STT) on the target currently cued in the radar scope. Increases precision and lock resilience, at the expense of the ability to track multiple targets (which is irrelevent in a 1v1) and letting the target know you are tracking them. |
| RADAR CUE | Slews your cursor on the radar scope. Used to mark the target on the radar scope. |
| WVR RADAR CYCLE | Toggles the radar mode between BVR and WVR. There are technically two WVR radar modes: ACM and HMS. These will be covered in the dogfighting. This button doesn't really have a use in BVR, but is important if you're accidentally in WVR mode. |
| BVR RADAR CYCLE | Toggles the radar mode between BVR modes. These are SRC PD, TWS, SRC PD HDN, TWS HDN, SRC GMTI, and TWS GMTI. These will be covered below. |
| MISSILE | Starts the missile seeker. Pressing it again will fire the missile if the missile is tracking the target. |
| MISSILE SELECTOR | Cycle through the missiles available. Recall that you want the Active Radar Missile (Derby) selected for BVR combat. |
| COUNTERMEASURES | Fires countermeasures - both chaff and flares. |
Engagement Process
Now, let's break down the steps from detection of a bandit to firing a missile. Below is a general detect-to-engage process for BVR combat.
- Search - Find the enemy with radar
- Track - Engage a radar track on the bandit and ensure a good firing solution
- Fire - Fire the Fox-3 missile.
If all goes well, you get to shoot down a plane without ever being in the same zip code. Let's go over each part in detail now.
Search
Detecting the enemy in BVR combat is all about understanding your radar system. I mentioned earlier about the BVR radar modes; let's go through them in detail now.
| Mode | Name | Description |
|---|---|---|
| SRC PD | General Search, Pulse-Doppler | Detects enemies but does not allow missile firing unless targets are cued and STT is engaged. |
| TWS | Track While Scan | Detects targets and allows missile firing if cued. STT can be engaged. Main mode for BVR (Beyond Visual Range) combat. |
| SRC PD HDN, Pulse-Doppler | General Search, Pulse-Doppler, Headon Filter | Same as SRC PD, but filters only head-on targets. |
| TWS HDN | Track While Scan, Headon Filter | Same as TWS, but filters only head-on targets. |
| SRC GMTI | Search, Ground Moving Target Indicator | Ground radar; not useful in air-to-air combat. |
| TWS GMTI | Track While Scan, Ground Moving Target Indicator | Ground radar; not useful in air-to-air combat. |
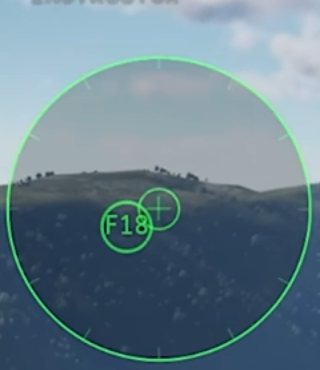
This video shows the search process. I initially begin in SRC PD mode, get two faint signatures (shown as small boxes), switch to TWS and get a target detected (shown as a circle with velocity vector).
Track
Now that a target is detected, the next step is to track it. This is a fairly simple procedure of slewing the radar scope cursor (displayed as two vertical lines) over The
target. Use the RADAR CUE joystick to bring the cursor on top of the radar target. If you are in TWS mode, it will automatically set it as the active track
(displayed with a doubled set of vertical lines now around the target circle) and automatically follow them.
You can also Single Target Track the target and lock the aparture firmly on them in both TWS or SRC PD modes. The radar will not search anymore and only track them. This comes with the
advantage of a much more persistent track but comes with the downside of being unable to detect anything else and giving the target a track warning on their RWR.
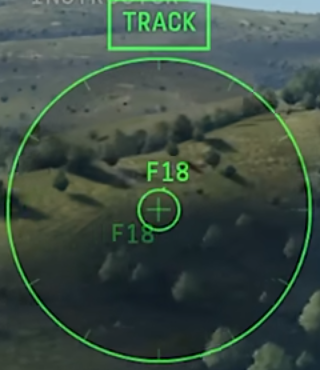
This video shows the track process. I have two targets in my TWS scope, and lock onto the left one. Using my Heads Up Display, I point my nose towards the target circle.
The reason for this is to ensure that my missile has a direct firing solution instead of wasting energy on an off-boresight launch. Additionally, I ensure that the target is roughly
within the Derby's effective range of about 18 miles - this can vary by a few miles based on relative velocities, altitudes, etc.
If there isn't a good firing solution - say they're out of range, flying away from you, or maybe notching you. You can always continue to track them and place yourself in a better
firing position. You only have two Fox-3 missiles, so you want to make them count.
Fire
Now I have a target locked and I have a good firing solution. Now you may fire.
The procedure is fairly straightforwards, but there's a common error that may pop up. Make sure that you have the Active Radar Homing Derby missile selected, not the IR seeking Python-3.
You can always see what missile you have selected based on the upper left UI. Remember to use the pinky MISSILE SELECTOR button to cycle between them.
This video shows the firing process. I have the target tracking in my TWS scope, and I already know I have a good firing solution. I press the MISSILE fire button and ... hear a growl.
That immediately tells me that I have an IR seeking missile, a Fox-2 missile, selected. I switch to the Derby; now a Fox-3 missile is tracking my radar track. Finally, I fire.
BVR Defense
How do we defend against an enemy Fox-3 missile? First you have to have the situational awareness to identify that an enemy Fox-3 has been launched at you. You do this by always keeping an eye on your RWR.
You RWR generally has three states:
| State | Description |
|---|---|
| Pinged | A radar beam hit your aircraft. The originator may or may not be aware of your position. They possibly have a TWS track on you. |
| Track | A Single Target Track beam is locked onto your aircraft. The originator is definitely aware of your position. Note that a TWS track will not cause this state. |
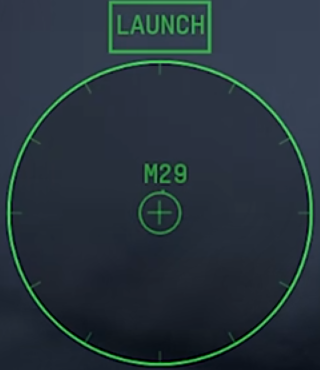
| Launch | Either a Fox-3 missile has gone pitbull on you after following a TWS track or a Fox-3 missile has been launched with a STT track. |
Now that you have a general idea of the threats on your aircraft, it's time to cover what defense options you have.
| Tactic | Description |
|---|---|
| Notch | Fly perpendicular to the enemy plane tracking you or the pitbull missile. You want to ideally place the RWR bearing to your 3 or 9 o'clock and pop some chaff to hopefully cause the pulse doppler to stop tracking you. |
| Crank | Flying offset to a bandit after firing your own missile. You're trying to not fly directly into their missile while still guiding your own missile in. It's kind of like a joust. Sometimes employed with a zig-zag or weaving pattern. |
| Terrain Masking | Hit the deck and fly low. If you fly low enough and hide behind terrain, the radar or missile may lose line of sight. Alternatively, if you fly very, very low (150 ft or lower) you also become difficult to track due to scattering. |
| Dragging | Turning cold and extending away from the threat. |
Final Words
Beyond Visual Range combat is won by preparation, positioning, and precision. Know your tools. Trust your radar. Own the fight. However, if it comes to it, you can brush up on the Dogfight Guide if the BVR sniper duel suddenly becomes a WVR knifefight.